
Tech , SaaS
How to Automate Your Shopify Dropshipping Store Step by Step

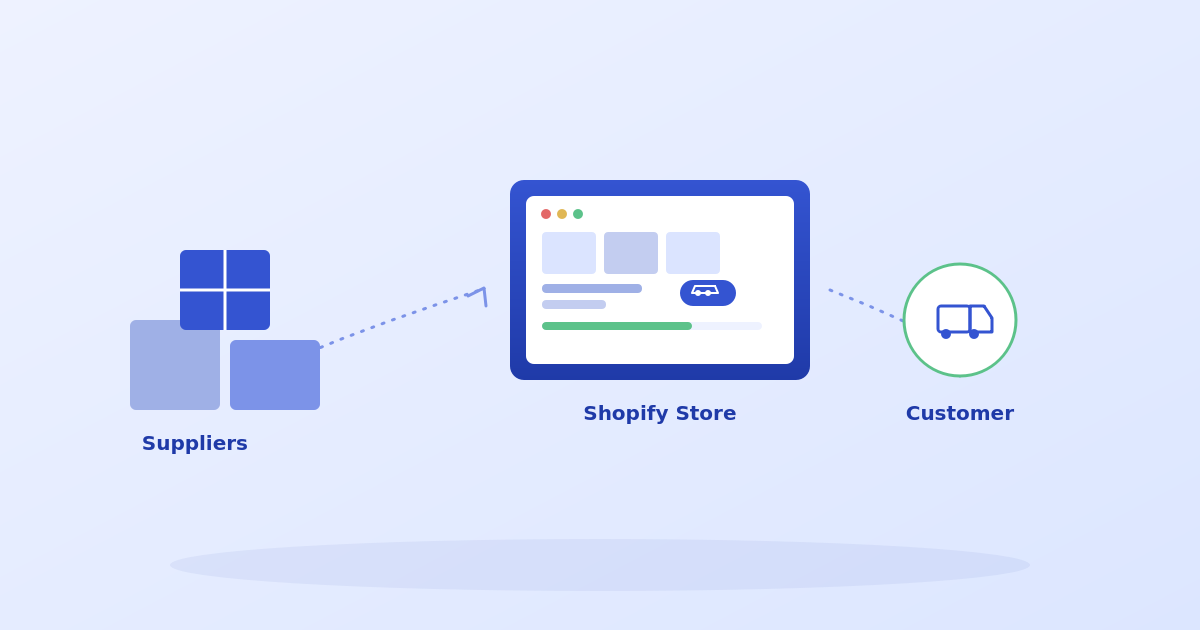
Running a dropshipping store sounds simple until the daily work actually starts piling up. Finding products, vetting suppliers, editing listings, processing orders, answering customer messages, and still trying to market the store on top of all that. It’s a lot for one person, or even a small team, to keep up with manually. That’s exactly why so many Shopify merchants start looking for ways to automate their dropshipping workflow without losing control over how their brand actually looks and feels to customers.
The right combination of automation tools connects your Shopify store with dropshipping suppliers so you can source products, import listings, and streamline order processing from one connected workflow. The real value here isn’t that automation replaces strategy. It removes the repetitive admin work so you can spend more of your time picking better products, improving your store, and actually acquiring customers.
In this guide, we’ll walk through how to automate product sourcing, imports, pricing, and fulfillment for a Shopify dropshipping store, while still building something that feels trustworthy enough for customers to come back and buy from again.
Why Bother Automating Shopify Dropshipping at All?
Automation is most useful when it shortens the distance between researching a product, publishing it on your store, and actually fulfilling the order once someone buys it. The goal isn’t just to save a few minutes here and there. It’s to build something closer to a repeatable operating system for your store, instead of manually rebuilding the same process every single time you add a new product or receive a new order.
What Automation Actually Changes in Your Daily Workflow
Without automation, you’re stuck manually copying product details from supplier websites, uploading images one at a time, and tracking every order across separate spreadsheets or tools. With the right sourcing and fulfillment apps connected to your store, you can instead discover products, import them directly into Shopify, and manage fulfillment from a single, centralized flow. Shopify stays your storefront and commerce engine the whole time, while your sourcing tools handle the supplier-side legwork in the background.
What Automation Still Can’t Do For You
It’s worth being honest about the limits here too. Automation doesn’t choose your niche, write your brand positioning, or guarantee that any particular product is going to sell. You still need to personally review supplier quality, realistic delivery timelines, return policies, product margins, and how you’re communicating with customers. The stores that actually succeed use automation to move faster through the repetitive parts, then rely on human judgment to decide what’s actually worth selling.
How to Automate Dropshipping on Shopify, Step by Step
With the right setup, dropshipping automation becomes a lot more manageable because you can streamline product importing, inventory updates, order processing, and supplier management from one connected system instead of juggling everything separately.
Step 1: Connect a Sourcing App to Your Shopify Store
The first move is connecting your chosen sourcing and fulfillment app to your Shopify store so the two platforms can actually talk to each other. Most sourcing apps offer a couple of different setup paths, usually either connecting directly from the app’s own dashboard or installing the app straight from the Shopify App Store.
If you already have an account set up with a sourcing platform, you can typically log in, head to the store connection section, select Shopify, and enter your store’s URL. This tends to be the cleanest path if your subscription, saved products, or product research already live inside that platform.
If you’re starting from the Shopify side instead, you can open the Shopify App Store, search for the sourcing app you want to use, click install, and approve the requested permissions. After installation finishes, you’re usually redirected straight into that app’s dashboard so you can start browsing products and setting up your workflow right away.
Step 2: Source Products From Suppliers That Actually Fit Your Niche
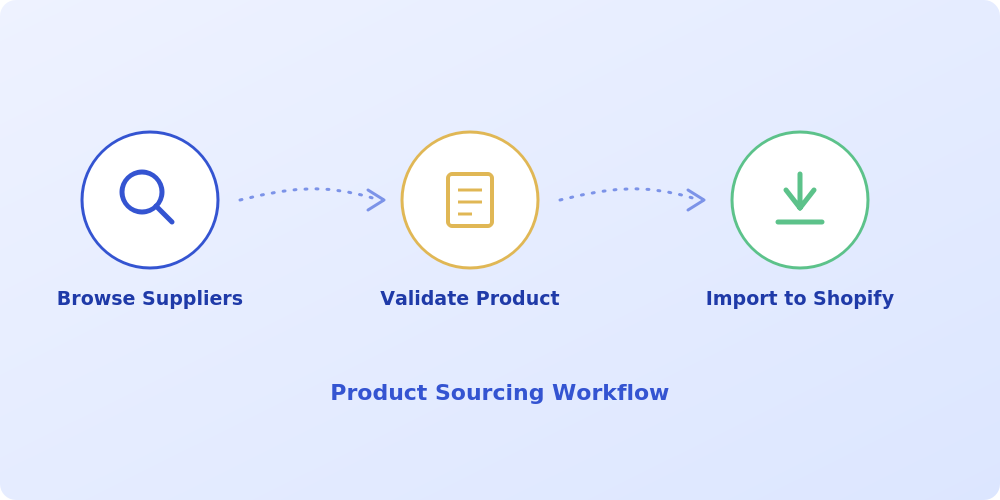
Once your store is connected, product sourcing becomes the real heart of your automation workflow. The faster you can compare supplier options, shipping expectations, product fit, and margins, the easier it becomes to build out a catalog without just guessing your way through it.
Use supplier location and shipping speed as a filter. Many sourcing platforms give you access to suppliers across the US, EU, and other global regions, and this matters more than it might seem at first. Shipping speed has a direct effect on conversion rates, support ticket volume, refund requests, and whether customers come back to buy again. If most of your target customers are in the United States or Europe, start by prioritizing products with supplier locations and delivery windows that actually match those markets.
Validate products before you ever import them. A product isn’t worth adding to your store just because it looks popular in someone else’s catalog. Take the time to check the product images, description quality, available variants, supplier details, product cost, suggested retail price, shipping cost, and your expected margin after all of that. For higher risk products you’re planning to push hard, it’s worth ordering a sample yourself before scaling up ad spend or email campaigns around it.
Step 3: Import and Actually Optimize Your Listings Before Publishing
One of the biggest time savers in any dropshipping automation setup is importing product data straight into your store instead of building every single listing from scratch. That said, the stores that convert best almost never publish supplier copy exactly as it was written.
Rewrite product titles for search and clarity. Supplier titles are usually written for internal catalog management, not for how an actual customer searches. Rewrite them with buyer intent in mind. A plain supplier title like “Portable Blender 350ML” can become something like “Portable USB Blender for Smoothies and Travel,” which keeps the core keyword intact while making the actual benefit much easier to understand at a glance.
Improve the descriptions, images, and pricing before you go live. Edit the product description so it actually answers the questions a customer has in their head: what the product is, who it’s for, how it solves their problem, what comes in the package, and what they should expect with shipping. Review the images for consistency, remove anything duplicated or low quality, set variants clearly, and price the product with enough margin to cover product cost, shipping, transaction fees, returns, discounts, and whatever you’re spending on paid marketing.
Step 4: Automate Order Fulfillment Without Losing Control of the Process
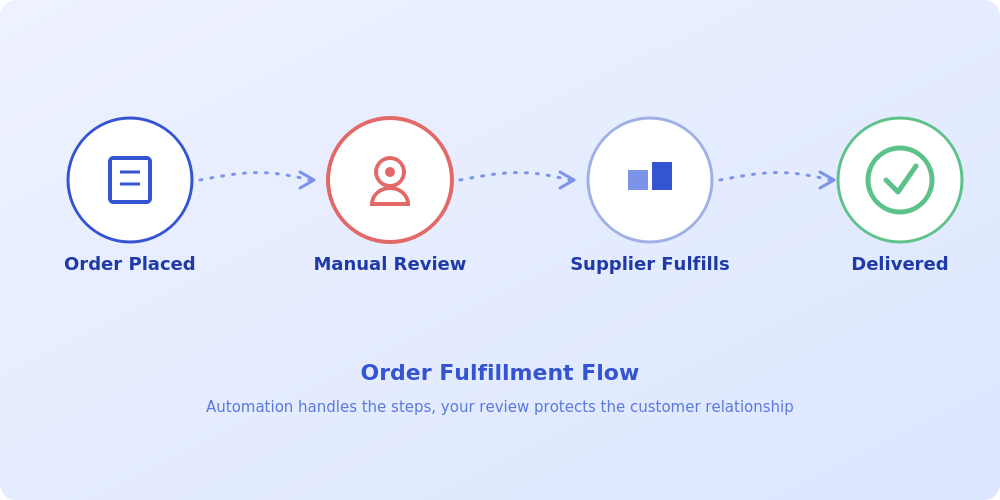
Order fulfillment is where dropshipping automation becomes the most visible, both to you and to your customers. Dropshipping suppliers generally fulfill orders directly to the end customer, while fulfillment apps sync with your Shopify admin so order status updates flow naturally through your existing store workflow.
What actually happens after a customer places an order. Once someone buys from your store, your job becomes making sure that order moves into the correct fulfillment path, the customer receives clear status updates along the way, and any tracking information gets handled consistently. Depending on your specific setup, your sourcing and fulfillment tools can help streamline this whole process so you’re not manually rebuilding every order by hand.
Keep a manual review layer in place for a better customer experience. Don’t treat automation as a reason to stop checking your orders altogether. Build a quick daily habit of reviewing payment issues, address errors, out of stock products, fraud warnings, supplier delays, and any customer messages that have come in. The best automated systems keep the overall process moving smoothly, while your own manual review layer is what actually protects the customer relationship when something inevitably goes a little sideways.
Step 5: Build a Repeatable Growth Workflow Over Time
Once your initial setup is in place, the next real goal is turning your sourcing and fulfillment process into a repeatable growth loop. Test new products, keep the ones that actually perform, cut the weak performers, and keep refining the overall store experience. This is the point where automation starts genuinely supporting revenue growth, not just saving you a bit of time here and there.
Treat product testing like a weekly habit. Pick a small batch of products to test every week rather than overhauling your whole catalog at once. Look for clear demand signals, a decent margin, strong product visuals, manageable shipping times, and a customer promise you can actually keep. Group new additions into focused collections instead of flooding your store with unrelated items. A tighter, more focused catalog is both easier to market and easier for customers to trust at a glance.
Strengthen the brand built around each product. Many sourcing apps offer brand building features like branded invoicing and direct supplier communication. Lean on whatever tools are available there, then back them up with stronger product pages, transparent shipping copy, thoughtful post purchase emails, and clear return instructions. Customers will likely never see your actual supplier, but they will absolutely remember how your store made them feel throughout the whole experience.
A Practical Shopify Dropshipping Automation Checklist
Use this as a simple launch and ongoing maintenance guide. It’s meant to keep the workflow approachable for beginners while still covering the controls that genuinely matter once real orders start coming in.
Before launch:
. Connect your sourcing app to Shopify and confirm the connection is actually working
. Choose a focused niche or collection instead of importing a wide spread of random products
. Review supplier location, product cost, shipping estimates, and available variants
. Rewrite product titles and descriptions with buyer intent in mind
. Set pricing with enough margin to cover ads, discounts, returns, and transaction fees
. Place a test or sample order for any product you plan to promote heavily
. Create your shipping, return, privacy, and contact pages before sending any traffic
Every week:
. Review new orders, delayed shipments, and tracking updates
. Remove products with poor margins, weak engagement, or ongoing supplier issues
. Add a small number of new products based on genuine niche demand
. Improve pages that get traffic but aren’t converting well
. Check recurring customer questions and add answers directly to product pages or your FAQ
. Test one new offer, bundle, email flow, or paid traffic angle
Common Mistakes to Avoid When Automating Dropshipping
Most automation mistakes come from moving too fast without enough quality control along the way. A dropshipping automation app can absolutely save you hours of manual work, but it can’t fix a confusing store, a weak offer, or poor product selection on its own.
Importing far too many products at once. A huge catalog might look impressive sitting in your dashboard, but it tends to feel messy and overwhelming to actual shoppers. Start with a focused collection, polish those listings properly, and only expand once you understand which products and messaging angles are genuinely converting.
Ignoring shipping expectations and return policies. Customers care a lot about realistic delivery dates and easy support when something goes wrong. Before promoting any product heavily, confirm shipping expectations and the supplier’s actual return policy. Put honest, realistic shipping language directly on your product pages so customers don’t feel misled right after checkout.
Publishing supplier copy without editing a word of it. Duplicate supplier descriptions can quietly hurt trust and make your store feel generic and forgettable. Rewrite the copy in your own brand voice, add benefit led bullet points, address common objections directly, and make your call to action genuinely clear. Better product pages give your automation a much better shot at actually producing sales.
Is This Approach Right for Your Store?
This kind of automated sourcing and fulfillment setup tends to work especially well for entrepreneurs who want to launch a dropshipping store without handling physical inventory themselves, while still building a properly branded storefront and choosing products with real intention rather than randomly.
It’s a particularly strong fit if you’re a newer Shopify merchant looking for a guided way to discover suppliers, if you want access to a mix of US, EU, and global supplier options, if you want to test products faster without manually building every single listing, or if you simply want to spend less time on repetitive fulfillment busywork.
On the other hand, it’s worth pausing and reviewing your setup if your store needs highly customized packaging, unusual shipping rules, complex wholesale arrangements, or full control over warehouse operations. In those cases, automated sourcing tools can still be useful for early product testing, but you’ll likely want to compare them against third party logistics providers, private label suppliers, or some kind of hybrid fulfillment setup.
Final Thoughts
The easiest way to actually learn dropshipping automation is to connect the tools and walk through the workflow yourself rather than just reading about it. Start with a small, focused product set, use a sourcing app to find and import products, publish properly polished Shopify listings, and build a simple daily review habit for every order that comes in.
A focused catalog, clear product pages, and a genuinely streamlined fulfillment process can help you launch faster while still keeping the customer experience at the center of how you run the business.
Frequently Asked Questions
Can I automate order fulfillment for my Shopify dropshipping store?
Yes. Most dropshipping sourcing apps are built to help Shopify merchants streamline order processing and supplier fulfillment. That said, you should still review orders regularly for payment issues, address problems, supplier delays, and customer service requests that need a human touch.
How do I connect a sourcing app to my Shopify store?
You can usually connect from inside the sourcing app itself by selecting Shopify and entering your store URL, or you can install the relevant app directly from the Shopify App Store and approve the requested permissions during setup.
Can I import products from a sourcing app directly into Shopify?
Yes. Once your store and sourcing app are connected, you can typically browse products, review supplier details, customize the product information, and add selected listings straight into your Shopify store.
Are Shopify dropshipping automation tools free to use?
Most sourcing and automation apps offer some kind of free starting tier along with paid plans for broader product access and additional features. It’s worth checking each app’s current pricing page before making any specific claims to customers.
Does automated sourcing guarantee fast shipping?
Not entirely. Many sourcing platforms emphasize access to suppliers with fast shipping options, but actual delivery speed still depends on the specific product, the supplier, the customer’s location, and the shipping method chosen, so it’s worth checking each listing individually before promoting it heavily.
What kinds of products can I dropship through Shopify?
Common categories include apparel, accessories, beauty products, home goods, pet products, print on demand items, and a wide range of other niche products, depending on which suppliers are available through your chosen sourcing app.
Is Shopify dropshipping actually profitable with automation tools?
It can be, but profitability ultimately depends on product selection, pricing, supplier costs, shipping costs, ad spend, conversion rate, and customer retention. Automation reduces the time you spend on admin work, but it doesn’t replace the need for genuine product research and marketing strategy.
AI generated business plans have a reputation problem, and honestly, it is a deserved one. Ask almost any experienced investor or lender and they will tell you the same story: a plan that reads beautifully on the surface, complete with confident revenue projections and a tidy competitive landscape, only to fall apart the moment someone starts checking the actual numbers. Fabricated competitors, invented market statistics, and hockey stick growth curves built on nothing but optimism are disturbingly common when AI writes a plan without real human oversight.
That does not mean AI tools are useless for business planning. Quite the opposite. Used correctly, they can dramatically speed up drafting, help organize scattered ideas, and handle the financial modeling grunt work that used to eat entire weekends. The real skill lies in knowing which tool actually fits your situation, and understanding exactly where AI assistance needs a human check before anything gets sent to an investor or a bank.
This guide walks through the strongest AI business plan tools available, what each one is genuinely good at, where they tend to fall short, and how to think about picking the right one for your specific situation.
Why So Many AI Generated Plans Fall Apart Under Scrutiny
Before comparing specific tools, it helps to understand exactly why this category of software struggles so consistently with credibility.
Large language models are fundamentally prediction engines. They generate text that sounds statistically plausible based on patterns learned from enormous amounts of writing, not text that has been fact checked against real market data. When asked for a competitor list or a market size figure without being given real data to work from, many tools will simply generate something that sounds reasonable rather than admitting they do not actually know the answer. This tendency, often called hallucination, is exactly why a business plan generated entirely by AI needs careful human verification before it goes anywhere near an investor or a loan officer.
Financial projections carry a similar risk. Without a real financial model behind them, AI tools tend toward unrealistic optimism: revenue ramps up faster than any real business typically achieves, costs stay suspiciously low, and timelines quietly ignore the operational delays every founder actually experiences. None of this is necessarily malicious. It simply reflects what these models were trained to do, which is produce plausible sounding text, not verified financial forecasting.
What Investors Actually Want Versus What Lenders Want
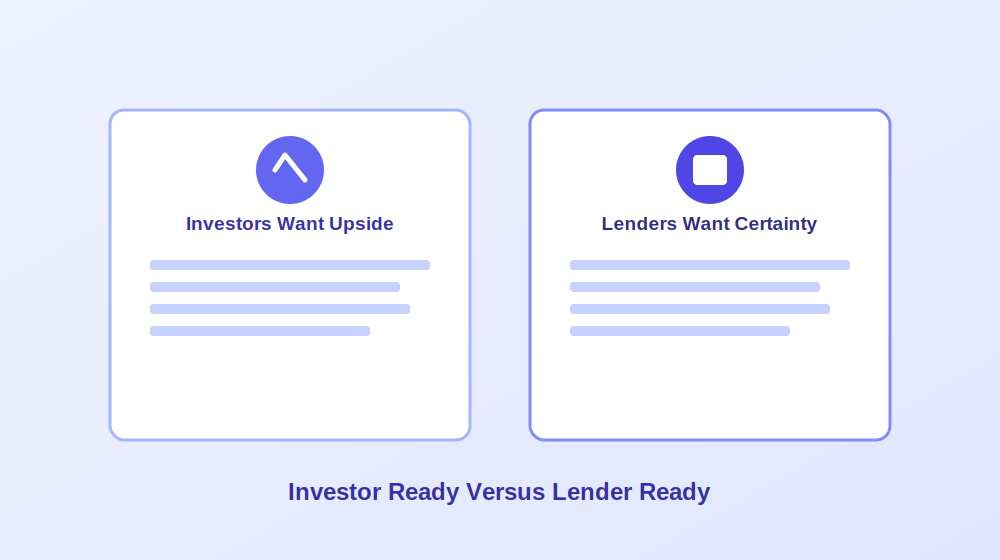
One of the most common mistakes founders make is treating “investor ready” and “lender ready” as the same goal. They are genuinely not, and understanding the difference changes which tool actually makes sense for your situation.
Investors are buying upside. They want a clear problem tied to a paying customer segment, real evidence that people want the product, whether that is a waitlist, signed letters of intent, or actual pilot usage, credible market sizing with sources attached, a specific go to market plan including realistic acquisition costs, a founder story explaining why your team specifically understands this problem, and growth projections that feel ambitious yet still grounded in reality. Many AI generated plans fail here specifically because they produce a polished sounding executive summary sitting on top of genuinely weak market logic, something experienced investors tend to notice within minutes.
Lenders are buying certainty. Banks, microlenders, and government backed loan programs care far more about predictability than disruption. A genuinely lender ready plan needs month by month cash flow forecasts, a healthy debt service coverage ratio, conservative revenue assumptions rather than optimistic ones, clear repayment logic, and multiple years of properly formatted financial statements. This is exactly why the quality of a tool’s financial projection engine matters enormously for anyone pursuing a loan rather than equity investment.
Strong AI Tools for Financial Forecasting and Lender Ready Plans
A category of dedicated business planning platforms focuses specifically on turning inputs into full, audit friendly financial models rather than just narrative text.
Tools in this category typically generate complete three statement financial models, meaning a profit and loss statement, cash flow statement, and balance sheet that actually connect to each other logically, along with scenario planning that lets you stress test assumptions before committing to them. Many integrate directly with accounting software, which keeps projections tied to real historical business data rather than numbers pulled from thin air.
The tradeoff with this category is usually flexibility and cost. These platforms tend to feel more rigid once you have moved past the guided setup process, the AI generated prose can feel somewhat generic without significant editing, and genuinely free tiers are rare, usually replaced with a time limited trial instead. For anyone pursuing an SBA loan or a bank line of credit specifically, though, this category consistently produces the most defensible, lender friendly output of any AI assisted approach.
Tools Built Around Guided Templates and Idea Validation
A different category of tool focuses on walking early stage founders through business planning step by step, using guided prompts about the idea, target customers, and rough finances before assembling everything into a structured plan.
This approach genuinely shines for beginners still validating whether an idea is worth pursuing at all. The guided structure prevents the blank page problem entirely, and the output, while lighter on deep financial analysis than dedicated forecasting platforms, gives a solid first draft to iterate on. The real limitation shows up once you need something publication ready for serious investor or lender review, since the analysis underneath tends to stay fairly high level by design.
Design Focused Tools for Presentation and Pitch Decks
A meaningfully different category of tool treats business planning primarily as a design and communication problem rather than a financial modeling one. These platforms excel at producing genuinely professional looking documents and pitch decks quickly, often through template driven layouts with AI assisted writing filling in each section.
The strength here is real: a business plan that looks credible and well organized meaningfully improves how it lands with a reader, and having free access to build something presentable without a subscription is genuinely valuable for early stage founders on a tight budget. The clear tradeoff is financial rigor. These tools generally will not build or verify your financial model at all, requiring you to paste in numbers you have calculated elsewhere, and they tend to skip the kind of standardized, lender specific formatting that a bank loan application actually requires.
Frameworks Based Strategic Planning Tools
Another category leans on established business strategy frameworks, things like SWOT and PESTEL analysis, to produce a first draft that feels more structured and consultant like than a typical AI generated document. This can genuinely add useful strategic depth quickly, helping surface risks and market factors a founder might not have considered independently.
The honest tradeoff is a real tendency toward unverified claims. Tools in this category have a documented pattern of generating market figures and references that sound authoritative but cannot actually be traced back to any real, checkable source. Anyone using this kind of tool needs to treat every statistic as an unverified starting point requiring independent confirmation, not a finished fact.
Budget Friendly Options for a Fast First Draft
For founders who mainly need a quick, low cost first draft rather than deep financial sophistication, a category of affordable planning tools exists specifically to fill that gap, often through a simple guided questionnaire and a one time payment rather than an ongoing subscription.
These tools generally will not impress a sophisticated investor on their own and lack the deep customization of pricier alternatives, but they consistently produce a reasonable, editable starting point faster and cheaper than almost anything else available. For internal planning documents or a rough draft meant to be heavily rewritten anyway, this category offers genuinely solid value.
Where a General Purpose AI Assistant Fits In
A general purpose conversational AI assistant is, in many ways, the most flexible tool in this entire comparison, and also the one carrying the highest hallucination risk by a wide margin.
Used well, a general assistant is genuinely excellent for early brainstorming, drafting an outline, tightening a weak paragraph, or turning messy bullet point notes into readable prose. It has no native financial modeling whatsoever, meaning any numbers it produces on request are effectively invented placeholders rather than a real calculation, and it has no built in structure unless you provide one yourself through careful prompting. For founders who already understand their own numbers and simply want writing help organizing ideas, this is a genuinely strong fit. For anyone hoping for a finished, verified document straight out of the box, it is very much the wrong tool for that specific job.
A few prompt patterns tend to produce noticeably better results than a single vague request. Asking specifically for an executive summary covering what the business does, who it serves, and funding needs works better than “write my business plan.” Requesting a market analysis that explicitly asks for total addressable market, target segments, and named competitors produces more useful structure than an open ended request. The same applies to financial assumptions: providing your own rough numbers and asking the assistant to organize them into a three year projection produces something considerably more grounded than asking it to invent projections from scratch.
The Hybrid Workflow Most Serious Founders Actually Use
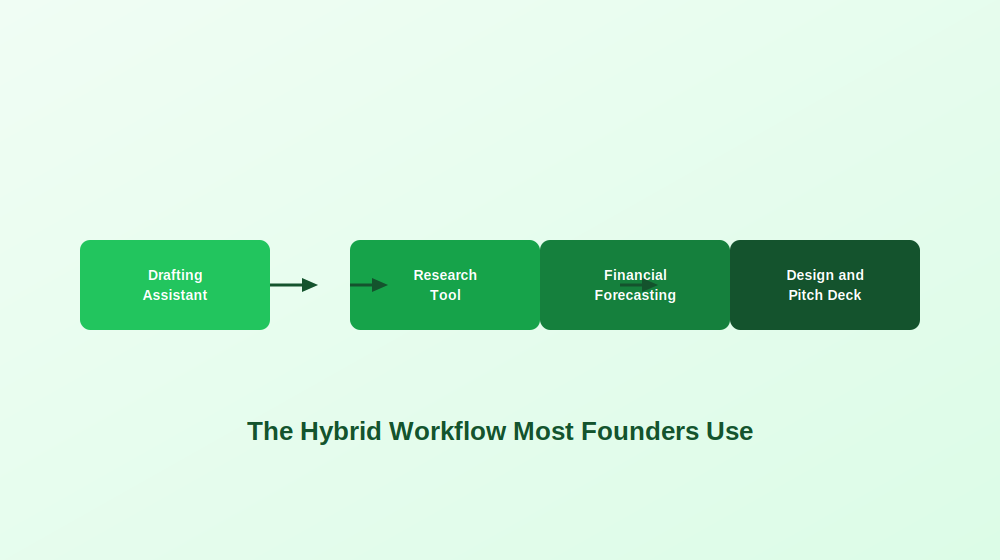
Across nearly every serious business planning effort, the strongest results rarely come from a single tool used in isolation. A genuinely effective workflow usually combines a conversational AI assistant for drafting and rewriting, a dedicated research tool for citation backed market data, a forecasting platform for the actual financial model, and a design focused tool for the final pitch deck and visual presentation.
This obviously takes longer than typing a single prompt into one tool and calling it done. But the resulting document consistently looks and holds up far better under real scrutiny, which matters enormously the moment an actual investor or loan officer starts asking follow up questions.
Matching a Tool to Your Actual Audience
The right AI business plan tool depends far more on who will actually read the document than on what industry you happen to be in.
For angel investors and venture capital, a forecasting focused tool for the financial model paired with a general assistant or design tool for narrative polish tends to work best, since investors care most about market logic, growth assumptions, and genuinely clear storytelling. For SBA or bank loan applications, a dedicated forecasting platform with proper three statement modeling and standardized formatting is close to essential, since a lender will scrutinize the math well before reading any vision statement. For first time founders still validating an idea, a guided, beginner friendly platform makes the most sense before investing further time into a fully polished document. For internal operating plans, speed usually matters more than polish, making a fast, flexible drafting tool the more practical choice. For grant applications, reviewers typically expect clarity and skimmable structure over financial complexity, favoring tools strong on organization and presentation.
Real Risks Worth Taking Seriously
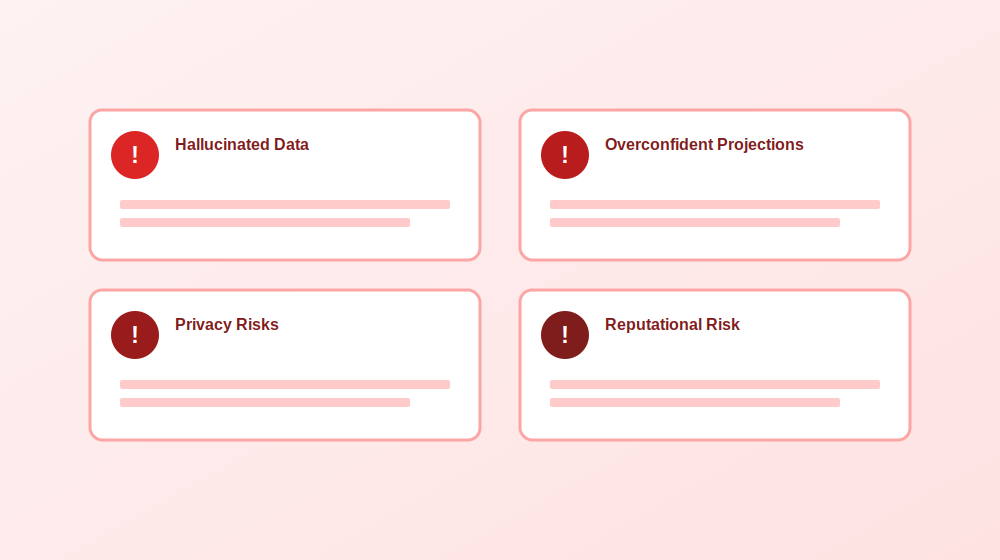
A handful of recurring problems show up constantly across founder communities discussing AI generated business plans, and each one has a fairly straightforward mitigation.
Hallucinated market data and invented competitors remain the single most common issue. The safest fix is manually verifying every statistic and claim against at least two independent, credible sources before it goes anywhere near a final document.
Overly optimistic financial projections show up almost universally in AI generated numbers. A simple stress test, reducing projected revenue by roughly thirty percent, increasing costs by a similar margin, and pushing timelines back by an extra ninety days, quickly reveals whether a business model actually survives more realistic assumptions.
Privacy and confidentiality risks deserve real attention too. Sensitive information, from customer lists to unreleased product details, should never be pasted into a tool without first understanding exactly how that platform handles and potentially retains submitted data.
Reputational risk with experienced readers rounds out the list. Investors and lenders review enormous numbers of plans and tend to recognize generic AI phrasing or logically inconsistent assumptions quickly. The real problem is rarely that AI was used at all. It is that the output was never properly edited, verified, or made genuinely specific to the actual business.
A Verification Checklist Before Sharing Anything
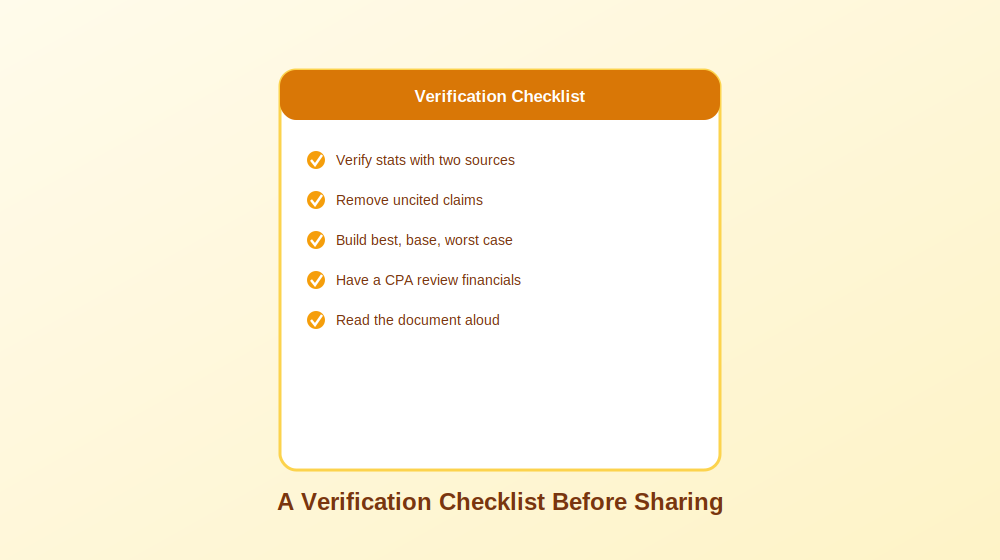
Before sending a business plan to anyone whose opinion actually matters, a short verification pass catches most of the problems that otherwise surface at the worst possible moment. Confirm every market statistic against at least two independent sources. Remove or clearly caveat any claim that cannot be properly sourced. Build out a best case, base case, and worst case financial scenario rather than presenting a single optimistic projection as certain. Have a qualified accountant or financial advisor review the actual numbers. And finally, read the entire document aloud, since this single habit catches robotic, AI sounding phrasing far more reliably than silently rereading it on a screen.
Frequently Asked Questions
Can AI actually create a usable business plan? Yes, particularly for early drafts, outlines, and organizing scattered ideas. The gap between a usable early draft and something genuinely ready to send to an investor or lender is real, and closing that gap requires human verification of every number, claim, and assumption.
Are free AI business planning tools worth using? Many are genuinely useful for early stage drafting and validation. Free tiers typically limit exports, deep financial forecasting, or collaboration features, but they remain a reasonable starting point before deciding whether a paid tool is actually worth the investment.
How accurate are AI generated financial projections? Directionally useful at best, but rarely investor or lender ready without significant manual adjustment. Most tools default toward optimistic assumptions unless a user deliberately stress tests the numbers against more conservative scenarios.
Will investors reject a plan just because AI helped write it? Generally no. Investors care far more about clarity, credibility, and consistent logic than which tool assisted with drafting. They will reject a plan with vague strategy or unsupported claims regardless of whether AI was involved in writing it.
What is the single biggest risk of relying on an AI generated business plan? Fabricated statistics and invented competitors that sound entirely plausible but cannot be independently verified. This single issue causes more damage to credibility than almost any other AI related mistake in business planning.
Final Thoughts
AI has genuinely changed how quickly a business plan can go from a rough idea to a structured, professional feeling document. What it has not changed is the fundamental need for human judgment, independent verification, and real financial discipline before that document reaches anyone whose decision actually matters. The founders getting the best results treat AI tools as genuinely capable collaborators for speed and organization, while keeping every number, every competitive claim, and every strategic decision firmly under their own control.
Writing a research proposal is one of those tasks that manages to feel exciting and genuinely intimidating at the same time. You usually have the ideas and a rough sense of direction, but turning that into a properly structured proposal is exactly where most people get stuck. This is where ChatGPT can genuinely help, provided you use it the right way.
This guide walks through how to use ChatGPT to draft a research proposal step by step, from narrowing down a topic to organizing methodology and polishing the final writing. The goal is never to outsource your actual thinking or let AI generate your research for you. It is to make the drafting process faster, less stressful, and considerably easier to organize while your own ideas and academic voice stay firmly in control.
One thing worth saying upfront: ChatGPT is genuinely useful for writing support and structure, but it is not a reliable source of truth. It can invent citations, misunderstand research context entirely, or state something confidently incorrect without any hesitation. Fact checking everything and verifying every source yourself remains non negotiable.
Is It Actually Allowed to Use ChatGPT for a Research Proposal?
Short answer: yes, in most cases. The real question is not whether you can use it, but how.
Most universities, supervisors, funding bodies, and journals have started accepting AI assisted writing tools in some capacity, particularly for drafting and editing support. The tricky part is that policies vary considerably. Some programs are entirely comfortable with using ChatGPT for brainstorming or editing, others require formal disclosure, and a smaller number restrict it heavily.
Before pasting your entire draft into ChatGPT at one in the morning, take a few minutes to actually check your program’s official policy. A reasonable rule of thumb: using ChatGPT as a genuine writing assistant is usually fine. Using it to replace your actual research thinking is where things get genuinely risky.
Where ChatGPT Genuinely Helps
A handful of tasks sit comfortably within acceptable use for most programs: brainstorming research topics or narrowing something broad, building an outline for your proposal sections, rewriting sentences for clarity, summarizing your own notes or articles you have already read, generating sample interview or survey questions, formatting headings and section structure, explaining complex concepts more simply, and checking tone, grammar, or general readability. In short, ChatGPT works best as a productivity and organization tool rather than a substitute researcher.
Where Things Get Genuinely Risky
A few uses cross real ethical or academic lines: generating fabricated findings or data, inventing citations or sources outright, presenting AI generated work as entirely your own independent thinking, uploading confidential or participant identifiable information, or using AI written content without ever reviewing or verifying it. ChatGPT can sound extremely confident while being completely wrong, which is exactly why verification matters so much in academic work.
A Quick Compliance Checklist
Before submitting anything, run through a short checklist: confirm your university, supervisor, or funder’s actual AI policy, keep copies of your drafts and prompts, disclose AI use if your institution requires it, verify every citation and statistic manually, avoid pasting sensitive research or participant data into any AI tool, and make sure the final proposal genuinely reflects your own reasoning and decisions.
The 30 Percent Rule: A Simple Way to Stay in Control
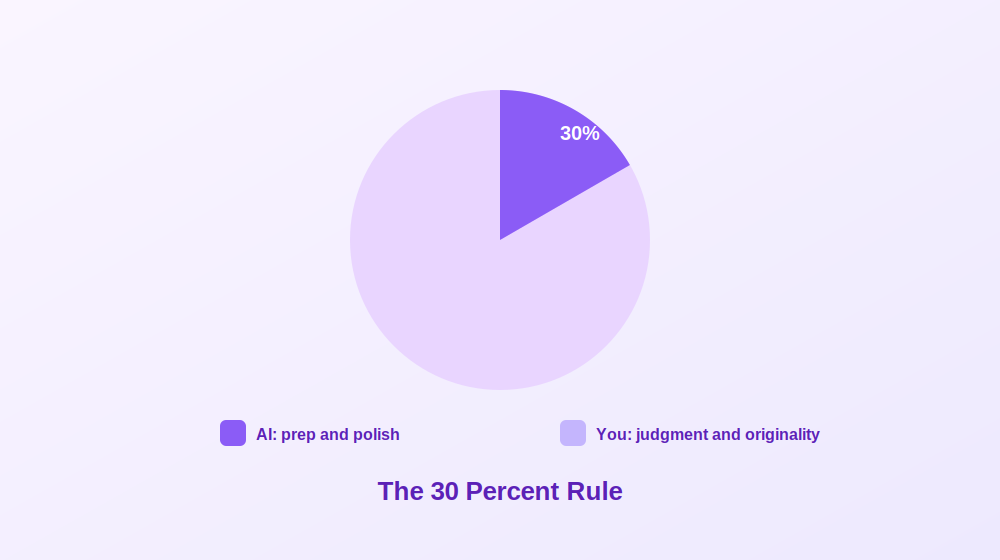
One of the easiest ways to use ChatGPT responsibly is a simple standard worth adopting as a habit: AI helps with preparation and polish, while you remain fully responsible for judgment and originality.
In practice, ChatGPT can help you move faster, organize messy thoughts, and improve overall readability. But the actual intellectual work, the real research thinking, still needs to come from you.
Tasks ChatGPT can genuinely help with include building proposal outlines, rewording awkward paragraphs, improving clarity and flow, suggesting alternate phrasing, turning bullet points into draft paragraphs, checking a proposal against a rubric, organizing literature themes, and creating draft section headings.
Tasks that need to stay firmly human led include identifying a meaningful research gap, making methodological decisions, defending why your study actually matters, assessing feasibility and limitations honestly, making genuine ethical commitments, interpreting sources accurately, verifying citations and evidence, and developing original arguments and insight.
This distinction matters more than most people initially realize. Reviewers can usually tell when a proposal feels generic, oddly over polished, or disconnected from real subject knowledge. Strong proposals sound thoughtful and specific precisely because they reflect genuine research judgment, not just smooth writing. Used carefully as a drafting and organization assistant rather than a replacement thinker, AI can genuinely make the process more manageable without compromising academic integrity.
Before You Prompt: The Core Parts of a Research Proposal
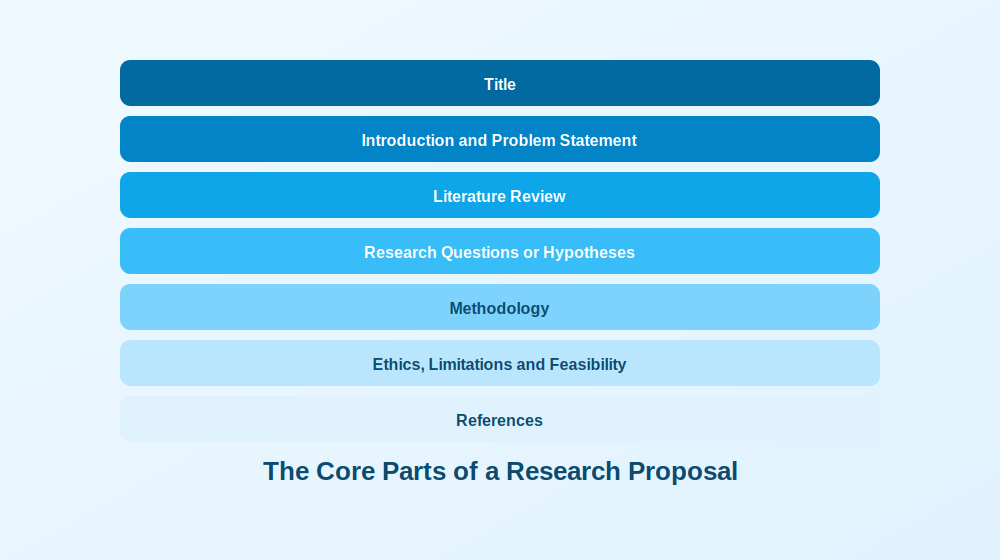
Before throwing prompts at ChatGPT, it helps enormously to know what a proposal is actually supposed to include. Jumping straight into “write my introduction” mode often means realizing halfway through that entire sections are missing.
The exact structure varies by university and department, but most proposals include a clear title, an introduction covering background and problem statement, a literature review summarizing existing research and gaps, research questions or hypotheses, a methodology section covering design and data collection, a section addressing ethics and feasibility, and a reference list. Depending on your program, you might also need a timeline, budget estimates, an expected outcomes statement, or a theoretical framework section.
A Master’s proposal is usually shorter and somewhat more exploratory, while doctoral and grant proposals go considerably deeper into methodology, originality, and expected impact. Always follow your department’s actual rubric over any generic template found online. A beautifully written proposal that ignores required formatting will be noticed immediately by reviewers.
Drafting Each Section With ChatGPT, Step by Step
Instead of asking ChatGPT to “write my research proposal,” which tends to produce generic, unusable output, treating it like a genuine collaborative assistant and working section by section produces dramatically better results.
Start by Giving ChatGPT Your Real Constraints
This single step makes an enormous difference. Most poor AI output happens because the prompt is too vague. ChatGPT cannot read your department’s rubric or your supervisor’s expectations unless you actually provide that information directly.
Before asking for a draft, share your discipline, academic level, word count limit, required headings, intended audience, citation style, research approach, and any major constraints around time, access, or sample size. A useful prompt frames ChatGPT as a research methods supervisor and asks it to suggest a realistic outline, flag missing information, and ask clarifying questions before drafting anything. If it immediately starts writing full sections without asking anything back, the prompt likely still needs more detail.
Generate and Narrow a Genuinely Feasible Topic
This step determines whether a proposal stays manageable or spirals into something far too ambitious. A strong topic is specific, researchable, feasible within your actual timeline, relevant to your field, and supported by data or participants you can genuinely access.
Useful prompts here include asking for ten possible topic angles within a broad area, each with a suggested research gap, methodology, target population, and feasibility notes, then narrowing your top three into one focused topic prioritizing realistic scope and methodological feasibility. Asking for a feasibility risk table covering recruitment, ethics, timeline, and data collection challenges at this stage can genuinely save months of future stress.
Write Research Questions, Aims, and Hypotheses
This section trips people up because the terminology sounds interchangeable but is not. A research aim describes the overall purpose. Research questions describe specifically what you want to investigate. Hypotheses are testable predictions, typically for quantitative work.
A genuinely useful workflow asks ChatGPT to generate a broad, medium, and narrow version of possible research questions with methodological implications for each, then convert the chosen questions into measurable objectives, and finally critique those questions specifically for clarity, scope, measurability, and feasibility. That critique prompt tends to be one of the most useful in the entire process.
Draft the Introduction With Real Structure
Strong introductions generally follow the same flow: introduce the broader topic, explain the problem, identify the research gap, state your purpose, and explain why the study genuinely matters. Asking ChatGPT to draft an introduction using exactly this structure, specifying your topic and academic level, tends to produce a solid working draft. Follow up prompts asking it to remove vague or dramatic language, or to expand the significance section for academic, practical, and policy relevance, sharpen things further. Reviewers notice quickly whether an introduction sounds genuinely research driven or just broadly interesting, so specificity matters enormously here.
Handle the Literature Review Carefully
This is arguably the most important rule in the entire process: do not rely on ChatGPT as your primary method for actually finding academic sources. Real literature searching should happen through Google Scholar, library databases, reference managers, or articles you have already personally collected and verified. ChatGPT’s real value here is organizing and synthesizing material you provide, not discovering it.
Useful applications include generating database search strings, creating inclusion and exclusion criteria, summarizing abstracts you paste in yourself, identifying recurring themes across sources, and building synthesis tables comparing methodology, sample, findings, and limitations across studies you have already verified. Asking it to identify research gaps using only the sources you provided, explicitly instructing it not to invent anything, keeps this process genuinely safe.
Build a Defensible Methodology
The methodology section is where reviewers start asking whether a study can genuinely work in practice. A strong methods section covers research design, sample and participants, data collection, instruments, analysis approach, and validity considerations alongside honest limitations.
Useful prompts include comparing two or three possible research designs with strengths, weaknesses, and ethical considerations for each, drafting the methodology section in future tense once a design is chosen, identifying threats to validity or reliability with realistic mitigation strategies, and, perhaps most usefully, asking ChatGPT to act as a skeptical reviewer challenging the methodology’s weaknesses and assumptions directly.
Address Ethics, Privacy, and What Never Belongs in a Prompt
This section deserves more attention than most people give it. Even a seemingly harmless topic requires real thought about confidentiality, consent, and data protection, especially where human participants are involved.
Never paste identifiable participant information, patient or health data, proprietary datasets, confidential institutional documents, unpublished results, sensitive transcripts, or partner organization information into a public AI tool. Safer alternatives include anonymizing examples, summarizing sensitive content instead of pasting it directly, removing identifying details entirely, and using institution approved AI tools where available. A useful prompt asks for a draft ethics section covering informed consent, confidentiality, data storage, risk mitigation, and withdrawal rights, alongside a separate data management plan covering storage, access, anonymization, and retention procedures.
Build a Realistic Timeline and Budget
This section shows reviewers whether a project is genuinely manageable within its stated constraints. Typical milestones include approval processes, recruitment, data collection, analysis, writing, revision, and submission. A useful prompt asks for a realistic project timeline table spanning six to twelve months with milestones and estimated completion dates, and, where required, a simple budget table with short justifications for participant incentives, software, travel, transcription, materials, and contingency costs. Even when a formal budget is not required, working through likely costs often surfaces feasibility issues early.
Save the Title and Abstract for Last
Writing a title first often means rewriting it more than a dozen times as the project evolves. It is usually far easier to finalize the title and abstract once the proposal is mostly complete, since your argument, methods, and contribution are clearer by then. Useful prompts ask for a mix of formal and slightly more engaging title options, followed by a concise abstract covering the research problem, literature gap, aims, methodology, and expected contribution in formal academic tone.
A Citation Safe Workflow That Actually Protects You
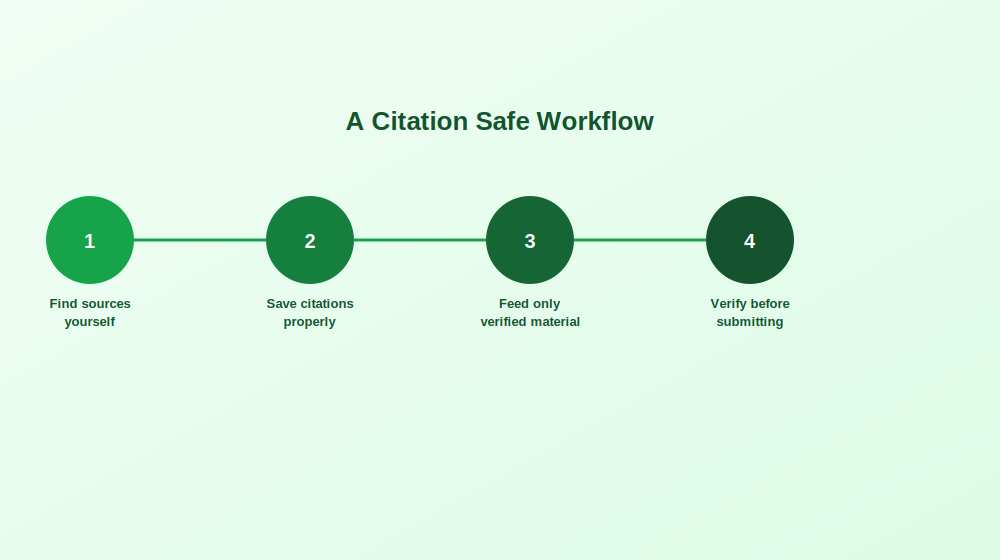
One of the biggest mistakes people make with ChatGPT is assuming it handles citations reliably. It genuinely does not. It can sound completely convincing while inventing article titles, fake identifiers, and authors who simply do not exist. Using AI generated references without independently checking them is essentially playing academic roulette.
A safer workflow starts with finding sources yourself through genuine academic databases and library tools, since deciding which studies are credible and relevant still requires real human judgment. Save verified citations properly in a reference manager, or at minimum a clean document listing authors, title, journal, year, identifier, and key findings.
From there, only feed ChatGPT material you have already verified yourself, whether that is your own notes, verified abstracts, or specific quotes you selected. Ask for synthesis rather than discovery: instead of requesting references about a topic, provide verified abstracts and ask what themes, disagreements, or gaps emerge across them. This keeps intellectual control firmly with you while still speeding up the actual writing.
Once ChatGPT helps draft or organize a paragraph, insert citations yourself manually using your verified source list, never copying AI generated citations directly. Before submitting anything, verify that every citation genuinely exists, confirm author names and publication years, check that identifiers actually resolve correctly, and run a similarity check alongside a careful review of paraphrased sections.
If ChatGPT does offer citations unprompted, treat them strictly as possible leads rather than trustworthy references. Search the title independently, verify the authors exist, confirm the journal is real, and discard anything that cannot be quickly verified.
Avoiding Patchwriting When Paraphrasing
A surprisingly common problem with AI assisted writing is patchwriting, meaning rewriting sentences just enough to sound different while still copying the original structure too closely. A safer approach quotes directly when exact wording genuinely matters, keeps page numbers for important quotations, rewrites ideas fully in your own structure and voice rather than swapping in random synonyms, and compares your paraphrase against the original source afterward. If a paraphrase still sounds suspiciously close to the source, it needs another pass.
Will AI Detection Actually Catch This?
Many students quietly wonder whether universities can reliably detect ChatGPT use. Honestly, not consistently. Detection tools remain imperfect, producing real false positives regularly, flagging genuinely human written work while heavily AI assisted writing sometimes passes undetected entirely.
Focusing purely on beating detection is the wrong mindset regardless. The real goal is producing work that is academically honest, policy compliant, and genuinely reflects your own thinking. Being transparent about your process, and able to show how your ideas actually developed, puts you in a considerably stronger position than trying to hide AI use entirely.
What genuinely helps demonstrate authorship if anyone ever asks includes early drafts and rough notes, annotated bibliography documents, research planning notes, version history in whatever document tool you use, saved prompts and outputs, and a simple log showing how the tool was actually used throughout. Students who use AI responsibly and transparently tend to be in a much safer position than those trying to conceal heavy use with zero documentation.
Common Mistakes Worth Avoiding
A vague prompt reliably produces generic writing. Adding real constraints, including your research focus, academic level, word count, relevant theories, and actual rubric requirements, consistently produces far more useful output.
Methods that do not match research questions happen frequently when sections get drafted separately. Running a dedicated alignment check, asking ChatGPT to review your questions and methodology together for mismatches, catches this surprisingly reliably.
Overconfident claims are another recurring issue, since ChatGPT tends to sound certain even when evidence is genuinely weak. Asking explicitly for more academic caution and flagged claims needing stronger evidence fixes this quickly.
Invented citations remain a persistent risk that only the citation safe workflow above genuinely protects against, requiring manual verification of every single reference without exception. Finally, tone and tense sometimes drift unexpectedly mid draft. Being explicit about formal academic English and future tense, specifically for a graduate audience, keeps things consistent.
A Final Checklist Before Submission
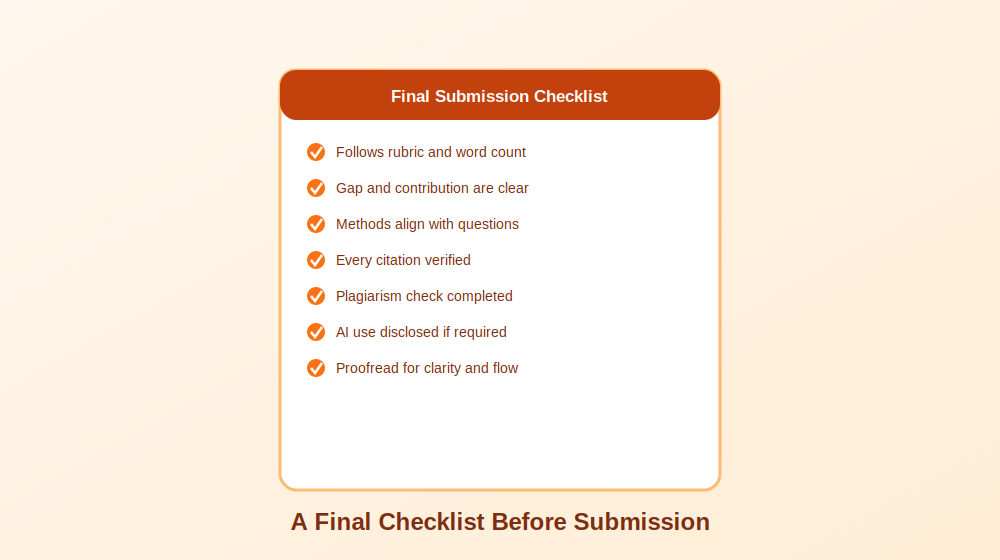
Before submitting anything, work through a last, careful pass: confirm the proposal follows the required rubric, headings, and word count; confirm the research problem, gap, and contribution are clearly explained; confirm research questions align genuinely with the methodology and analysis plan; confirm ethics, limitations, and data management are properly addressed; verify every single citation through a real database; complete a similarity or plagiarism check; confirm quotes and paraphrases are properly cited; disclose AI use if your institution requires it; save your AI contribution notes or prompt history; and proofread the entire document for clarity, flow, and concision.
This final review consistently matters more than people expect. A proposal built around a genuinely strong idea can still feel noticeably weaker to reviewers if small inconsistencies slip through. Spending an extra hour checking citations, alignment, and formatting is almost always worth the investment.
Final Thoughts
Used thoughtfully, ChatGPT can genuinely transform how manageable writing a research proposal feels, without ever replacing the actual thinking that makes a proposal strong. The students and researchers who get real value from these tools are the ones who treat AI as a capable drafting and organization assistant, while keeping every meaningful judgment call, every citation, and every core argument firmly in their own hands.
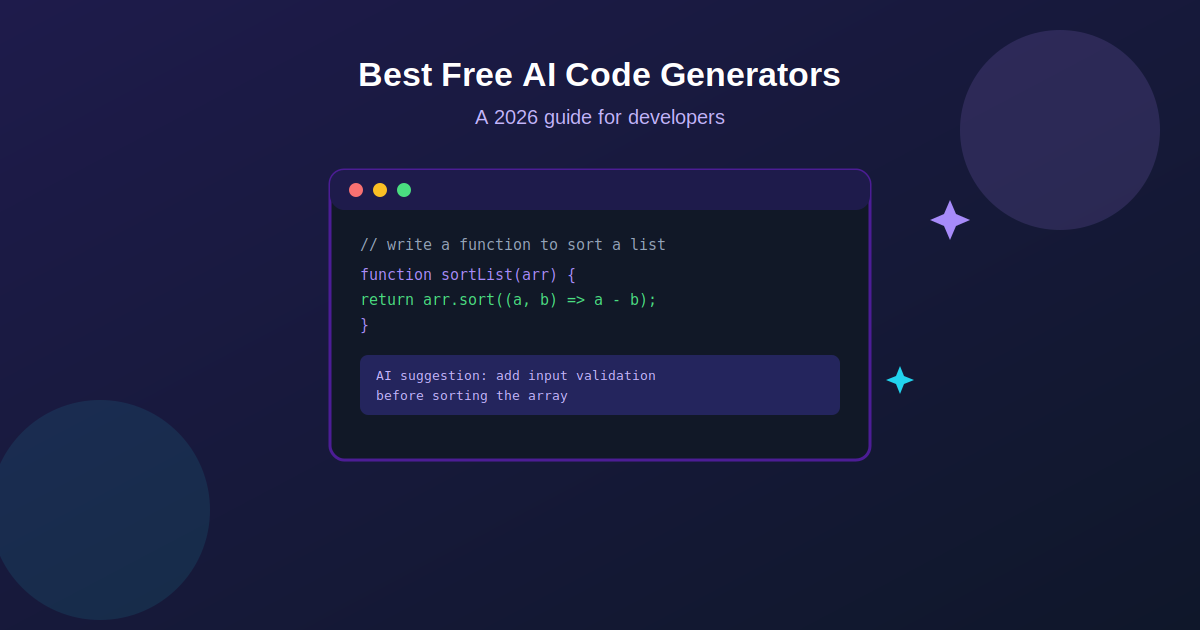
Artificial intelligence has reshaped nearly every corner of software development, and writing code itself is no exception. What used to mean typing out every line by hand now often starts with a plain language prompt and a suggestion that appears almost instantly. AI code generators have become genuinely useful tools for developers at every level, helping automate repetitive work, catch mistakes earlier, and speed up the overall pace of building software.
The good news is that some of the strongest tools in this space are available completely free, or offer a free tier generous enough for real daily use. This guide walks through what AI code generators actually do, how they work under the hood, and which free options are genuinely worth trying in 2026.
What Is an AI Code Generator, Exactly
An AI code generator is a tool that uses machine learning, and increasingly large language models trained specifically on code, to generate, complete, or optimize programming code based on a natural language prompt or existing context. Rather than requiring a developer to write every function from scratch, these tools understand programming syntax, common patterns, and language specific conventions well enough to produce working code from a simple description.
Modern AI code generators rely on natural language processing and deep learning techniques trained on enormous datasets of real, public code. That training is what lets them understand a request like “write a function to sort a list of numbers” and return something syntactically correct, reasonably optimized, and aligned with common best practices for that language.
Whether you are a complete beginner still learning fundamentals or an experienced developer trying to move faster on repetitive tasks, these tools genuinely change the daily rhythm of writing software, letting a developer focus more on architecture and problem solving and less on typing out boilerplate.
How These Tools Actually Work Behind the Scenes
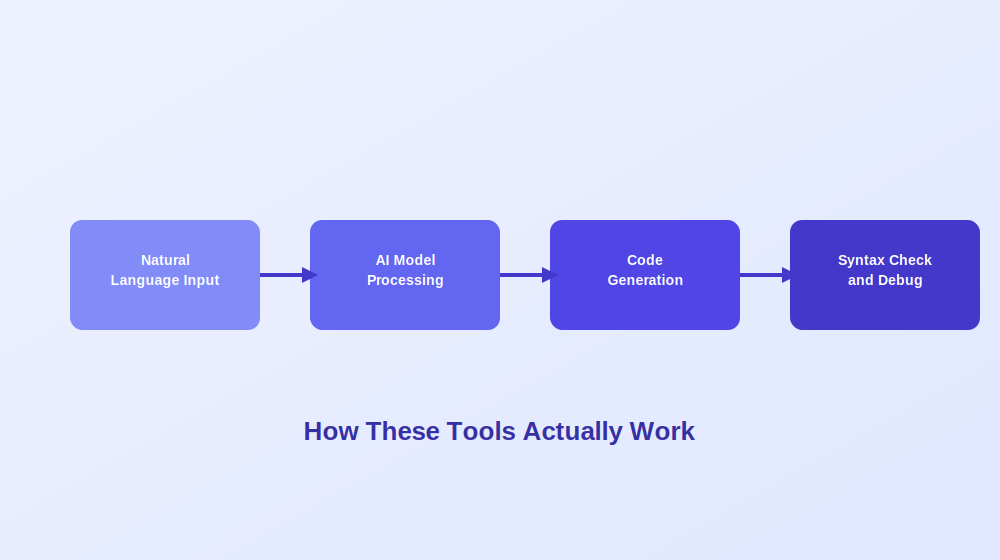
The general workflow behind most AI code generators follows a fairly consistent pattern, even though the specific models and interfaces vary quite a bit between tools.
It starts with understanding natural language input. A developer describes what they need in plain English, something like “write a Python function to calculate a factorial” or “add error handling to this API call.” The tool then processes that input using a deep learning model trained on vast repositories of real code, drawing on patterns learned across millions of examples to understand intent.
From there, the model generates a code snippet aiming to be both syntactically correct and reasonably optimized based on established best practices for that language and context. Many tools layer additional syntax checking and basic debugging on top of the initial output, catching obvious errors before ever presenting a suggestion to the developer.
The strongest tools go further still, understanding not just an isolated prompt but the broader context of an entire codebase, which lets them produce suggestions that actually fit the existing style, naming conventions, and architecture of a real project rather than generic, disconnected snippets.
Why Developers Are Adopting These Tools So Quickly
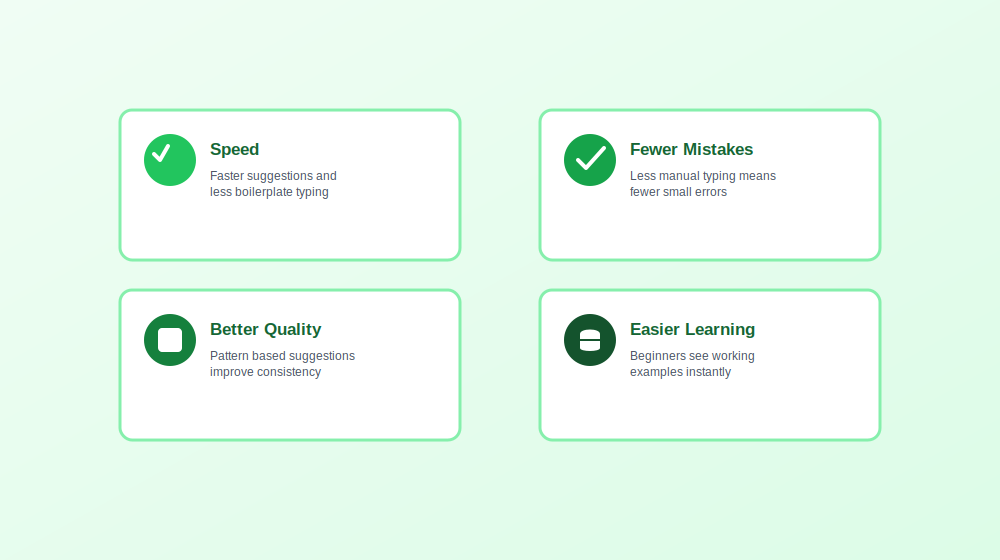
A few clear benefits explain why AI code generators have moved from novelty to genuinely standard tooling for a large share of developers.
Speed is the most immediate benefit. Instant code suggestions and automated handling of repetitive, boilerplate heavy tasks free up meaningfully more time for the parts of development that actually require human judgment, like architectural decisions and genuinely difficult problem solving.
Fewer careless mistakes tend to follow naturally. By reducing how much repetitive typing a developer does by hand, these tools cut down on simple syntax errors and small logical slips that would otherwise eat up debugging time later.
Better overall code quality is a less obvious but real benefit. Many tools analyze patterns across a codebase and suggest improvements a developer might not have considered, contributing to more consistent style and, over time, measurably fewer runtime errors.
A gentler learning curve for newer developers rounds things out. Someone still learning a language can see working, idiomatic examples generated instantly, which often teaches conventions and patterns faster than reading documentation alone ever could.
That said, none of this replaces genuine understanding. AI generated code still benefits enormously from human review, and treating suggestions as a strong first draft rather than a finished, trustworthy answer remains the safest way to use any of these tools.
Strong Free AI Code Generators Worth Trying
General Purpose Coding Assistants
One of the most widely adopted tools in this category, developed through a partnership between a major code hosting platform and a leading AI research lab, provides real time code suggestions directly inside your editor as you type. It supports a wide range of programming languages and frameworks, making it flexible enough for nearly any kind of project. While its full feature set generally sits behind a subscription, a free trial period gives developers a genuine chance to evaluate whether it fits their workflow before committing financially, and free access remains available for qualifying students and open source maintainers.
Another strong general purpose assistant integrates smoothly with popular code editors, offering completions and contextual suggestions based on what you are actively working on. It has built a reputation for genuinely useful autocomplete that adapts to a developer’s own coding patterns over time, and a solid free tier makes it accessible without any upfront cost.
Tools Built Around Broader Developer Workflows
A versatile assistant designed to help with a wider range of tasks beyond raw code generation, including documentation and debugging support, supports well over fifty programming languages and integrates with popular editors. Its free plan offers limited but genuinely usable functionality, letting developers explore real capabilities before considering a premium upgrade.
A newer entrant in this space focuses specifically on real time suggestions paired with debugging assistance and code optimization recommendations, integrating across a range of development environments and supporting multiple languages within a single, consistent workflow.
Open Source and Codebase Aware Options
For developers who want a genuinely open source option, one standout assistant is built specifically to understand an entire codebase rather than just the immediate file open in an editor. This context aware approach means suggestions, debugging help, and even generated documentation reflect how a specific project is actually structured, not just generic patterns pulled from public code in general. Being open source also means the tool can be inspected, modified, and self hosted by teams with stricter data requirements.
Fully agentic coding environments have also emerged as a distinct category, going well beyond simple autocomplete. These tools can reason across multiple files simultaneously, make coordinated edits from a single natural language instruction, and maintain context across a genuinely large project without losing track of how different pieces connect. For developers working on substantial, established codebases rather than small scripts, this category has quickly become one of the most useful additions to a daily workflow.
What the Future Likely Holds for AI Code Generation
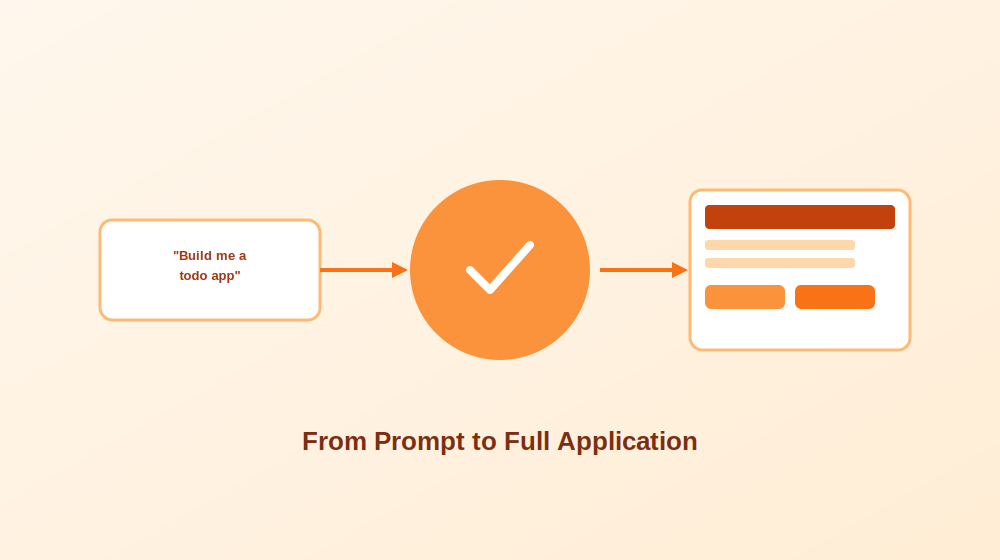
Today’s tools mostly generate snippets or assist with completing code a developer has already started. The next phase of this technology points toward something considerably more ambitious: building entire applications from a high level specification.
In practice, this could mean a developer provides a rough outline or a plain language description of an application, and the AI generates everything from the front end interface through the back end logic and even the underlying database schema. Early experiments along these lines, building a simple full stack application from a natural language description, have produced genuinely promising results, though not without real limitations.
Without meaningful human oversight, results tend to fall noticeably short of what a thoughtful developer would produce by hand. Fine tuning, careful debugging, and serious security review remain essential steps no AI tool can fully replace on its own. Even so, AI generated applications, used properly alongside human judgment, could meaningfully reduce development time and lower the barrier to entry for people just starting to learn to program, which represents a genuinely significant shift for the industry as a whole.
How to Choose the Right Free Tool for Your Needs
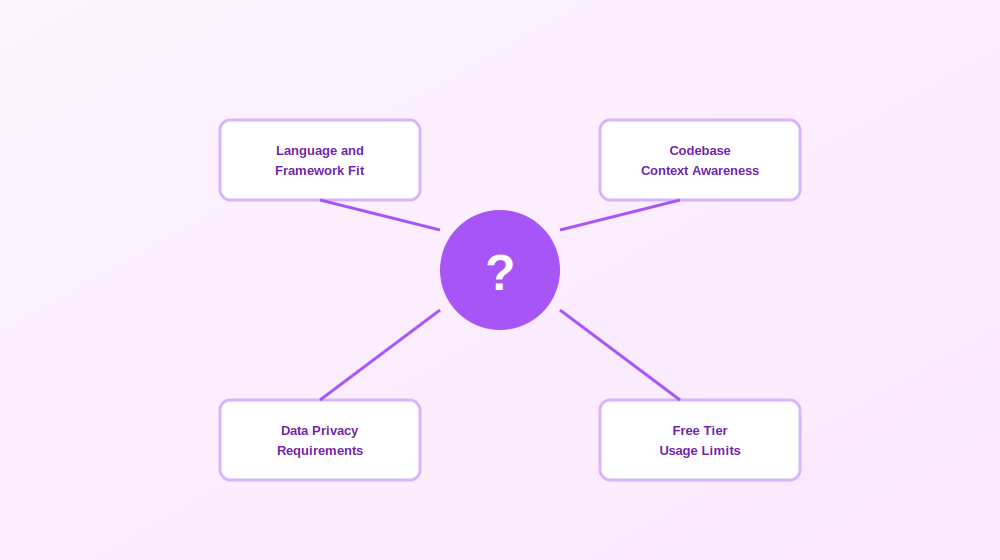
With a genuinely wide range of solid free options available, a few practical questions help narrow the field quickly.
What languages and frameworks do you actually work in? Some tools are broadly general purpose, while others perform noticeably better within specific ecosystems. Confirming strong support for your primary stack before investing time in a new tool saves real frustration later.
Do you need context across an entire codebase, or just inline suggestions? Simple autocomplete style tools work well for smaller projects and everyday scripting, while codebase aware assistants offer considerably more value on larger, established projects where consistency and architectural awareness genuinely matter.
How important is data privacy for your situation? Teams working with proprietary or sensitive code should look closely at how a given tool handles data, whether it trains on submitted code, and whether a genuinely self hosted or open source option might fit better than a fully cloud based service.
Does the free tier actually cover your real usage? Some tools offer a fully usable free tier indefinitely, while others provide only a limited trial before requiring payment. Understanding these limits upfront avoids an unwelcome surprise once a workflow already depends on a particular tool.
Getting the Most Out of an AI Code Generator
A few habits noticeably improve the results these tools produce in daily use. Writing clear, specific prompts rather than vague requests tends to produce meaningfully better suggestions, since the model has more genuine context to work with. Reviewing every suggestion before accepting it, rather than blindly trusting the output, catches the inaccuracies that inevitably slip through even the strongest models. Using these tools for genuinely repetitive, boilerplate heavy work while reserving complex architectural decisions for real human judgment tends to produce the best overall balance between speed and quality. And treating generated code as a solid first draft, not a finished, trustworthy answer, keeps the fundamentals of good software engineering firmly in place even as the tooling around it keeps evolving quickly.
Frequently Asked Questions
What exactly is an AI code generator? It is a tool that uses artificial intelligence and machine learning to generate, optimize, and suggest code based on a natural language prompt or existing context, trained to understand programming syntax, common patterns, and language specific best practices.
Are free AI code generators actually good enough for real work? Many are genuinely capable for everyday development tasks. Free tiers typically offer solid core functionality, though paid versions often add deeper context awareness, higher usage limits, and more advanced features for larger, more complex projects.
Can beginners use AI code generators to learn programming? Yes, and many find it genuinely helpful. Seeing working, idiomatic code generated instantly can reinforce syntax and common patterns faster than reading documentation alone, though a beginner should still take time to understand why generated code works rather than copying it blindly.
Will AI code generators eventually replace developers? Unlikely in any complete sense. These tools automate repetitive tasks and speed up routine work considerably, but they still lack genuine creativity, nuanced critical thinking, and the kind of deep, context specific problem solving that real software projects consistently demand.
What is the difference between a code completion tool and a fully agentic coding assistant? Code completion tools primarily suggest the next few lines or complete a function based on immediate context. Agentic assistants go further, reasoning across an entire codebase, making coordinated multi file edits from a single instruction, and maintaining broader project context throughout a session.
Do AI code generators work for every programming language? Most support a wide range of major languages, though depth of support genuinely varies. Some tools perform noticeably better in widely used languages with abundant public training data, while support for newer or more niche languages can be considerably more limited.
Final Thoughts
AI code generators have moved well past being a novelty and have become a genuinely practical part of how a large share of developers write software today. The strongest free options now offer real, meaningful value, whether that means faster autocomplete, smarter debugging assistance, or codebase aware suggestions that actually understand the project you are working within. The technology keeps evolving quickly, and the gap between assisting with individual functions and helping architect entire applications continues to narrow. For now, the developers getting the most value are the ones treating these tools as a genuinely capable collaborator rather than a replacement for real engineering judgment, pairing AI generated speed with the kind of careful human review that good software has always required.

Best AI Business Plan Generators: A Practical Comparison Guide

How to Use ChatGPT to Write a Research Proposal the Right Way

Best Free AI Code Generators to Try in 2026

The Transformative Benefits of Artificial Intelligence in Modern Life

AI, SaaS, SEO & Link Building: The New Operating System of Digital Growth

Why Email Marketing Still Drives Real Business Growth in 2026
-
 Tech , SaaS5 months ago
The Transformative Benefits of Artificial Intelligence in Modern Life
-
 Tech , SaaS5 months ago
AI, SaaS, SEO & Link Building: The New Operating System of Digital Growth
-
 Email Marketing5 months ago
Why Email Marketing Still Drives Real Business Growth in 2026
-

 Business , Finance5 months ago
Business & Finance in the Modern World: Strategies, Trends, and Sustainable Growth
-

 Sports , Fashion5 months ago
Sports & Fashion: The Perfect Blend of Performance, Style, and Modern Lifestyle
-

 Business , Finance5 months ago
The New Economy: How Digital Innovation, Behavioral Finance, and Smart Systems Are Redefining Global Business
-

 Email Marketing5 months ago
Email Marketing in 2026: The Ultimate Strategy for Growth, Engagement, and Conversions
-

 Health , Education5 months ago
Health and Education: The Foundation of a Strong and Successful Society